1. Welcome!

Welcome to the Around The Table Techy Issues workshop!

The purpose of this workshop is to layout the importance of a good blog design and equip you with some knowledge to make that happen.

A blog design can visually compel visitors to want to know more about you!  A good blog design can spark an instant connection between you and your reader before they've even read anything! Remember, good design doesn't make up for good content, but it can create that "I want to read more!" feeling for  visitors. 

A good blog design should:
  • Clearly represent you and present your style!
    Your blog is all about you! It's your personal platform. New visitors and readers can instantly feel connected to you through your blog design and aesthetic! Your blog should clearly reflect your personality and be a platform for your voice.
  • Include one of a kind design elements
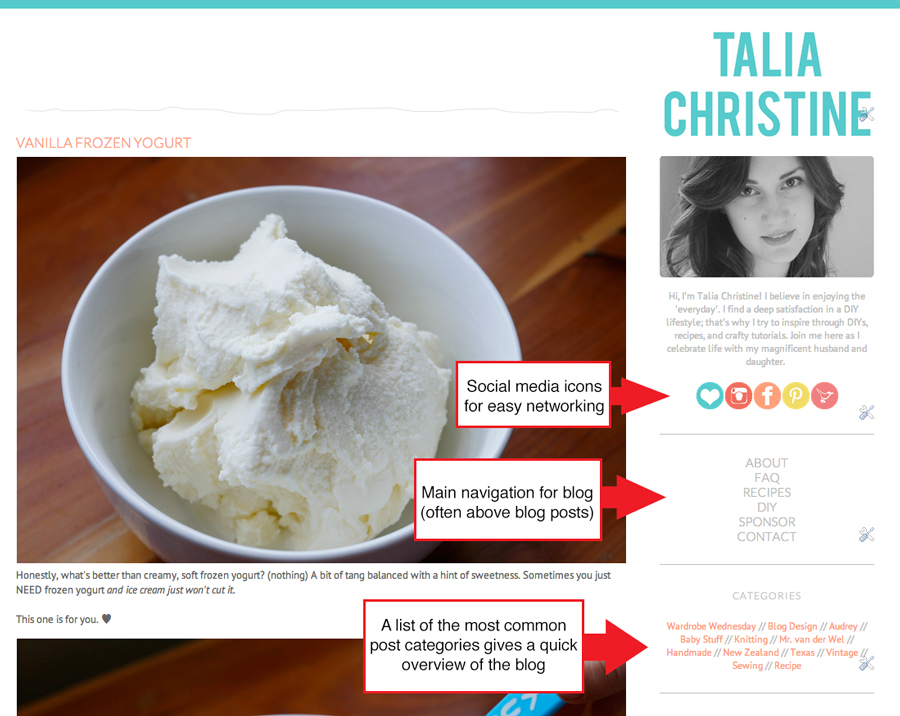
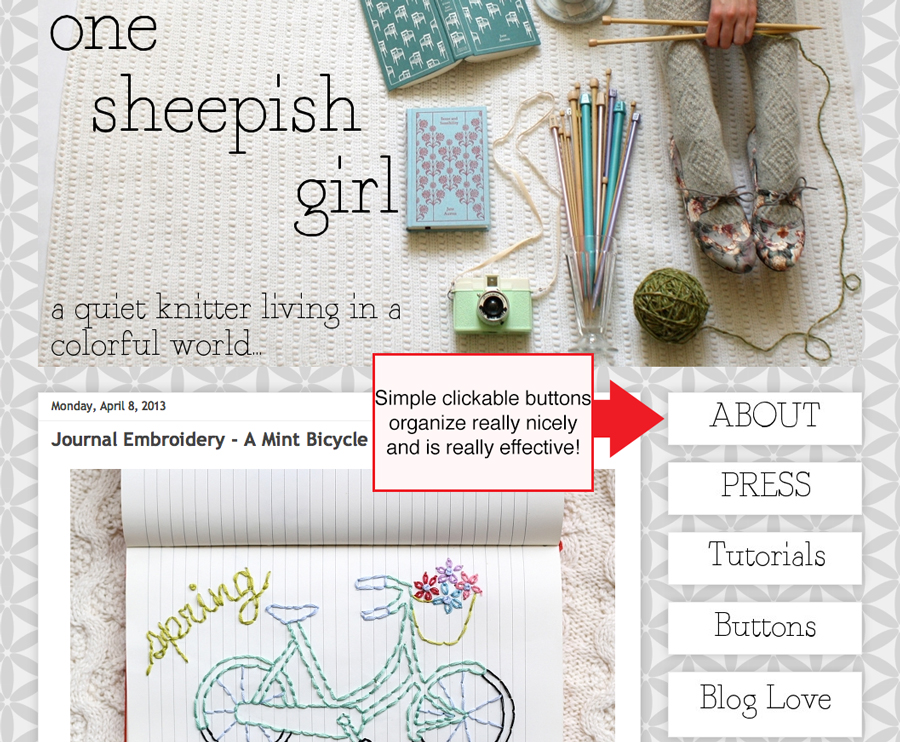
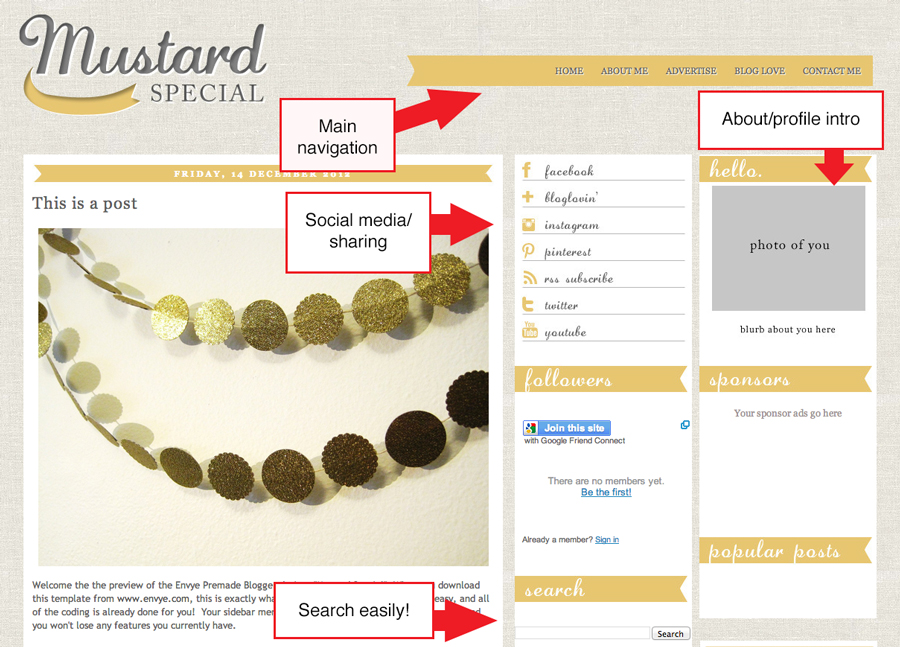
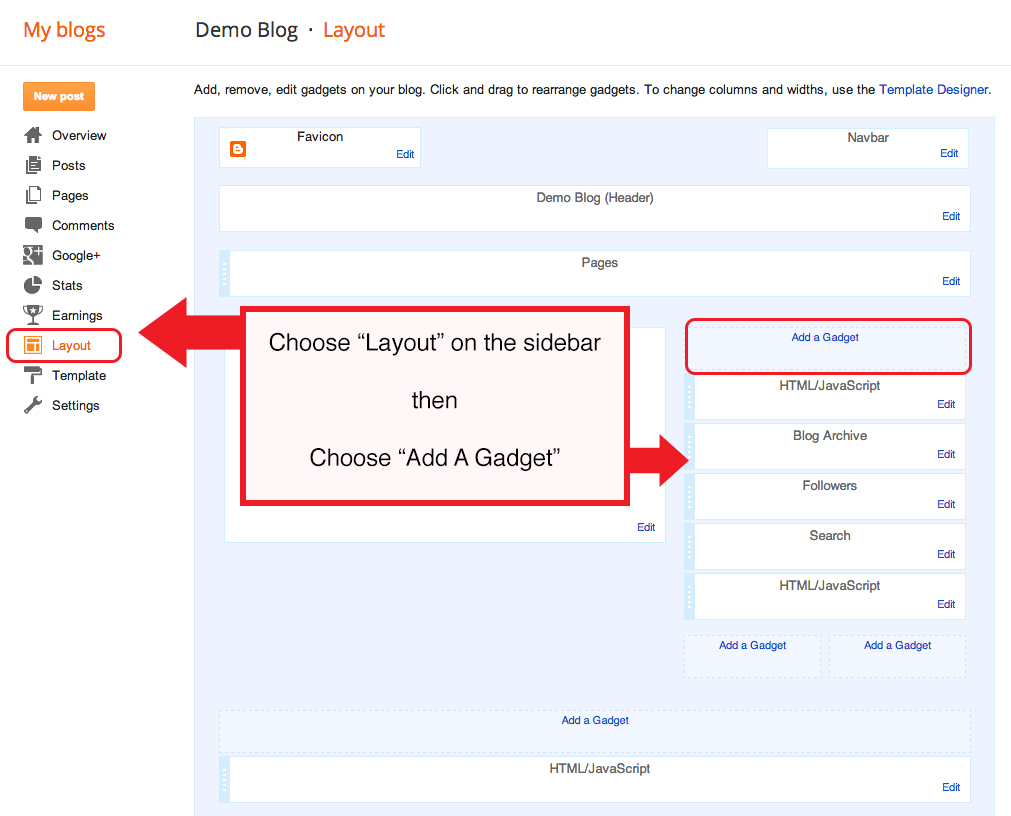
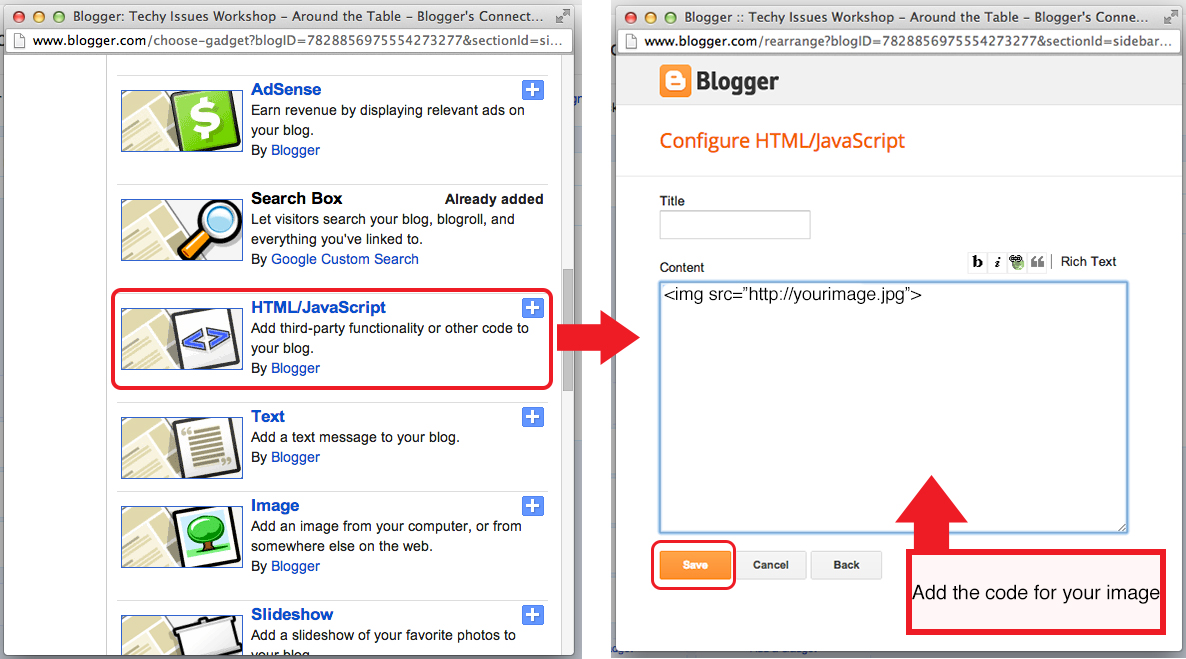
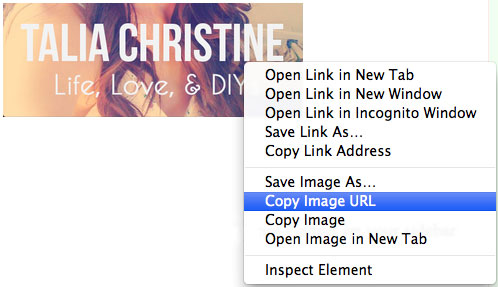
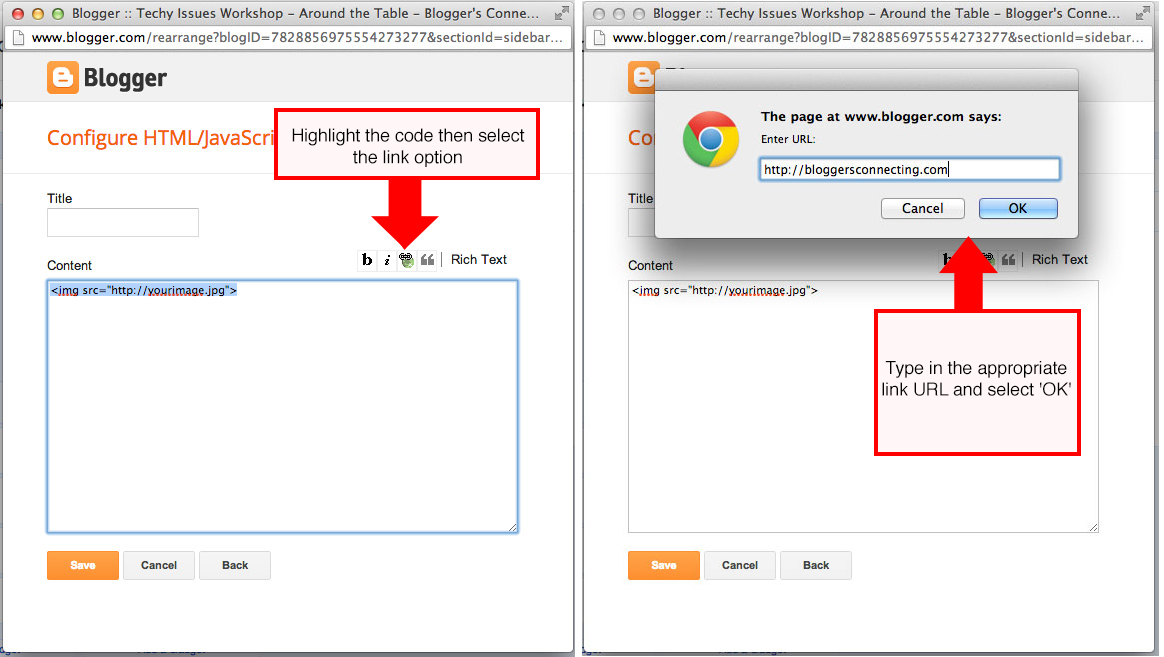
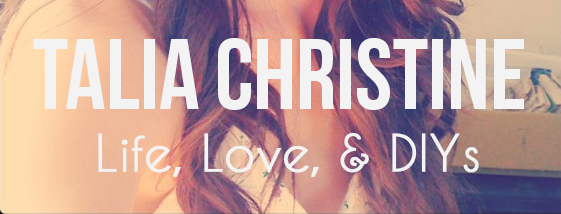
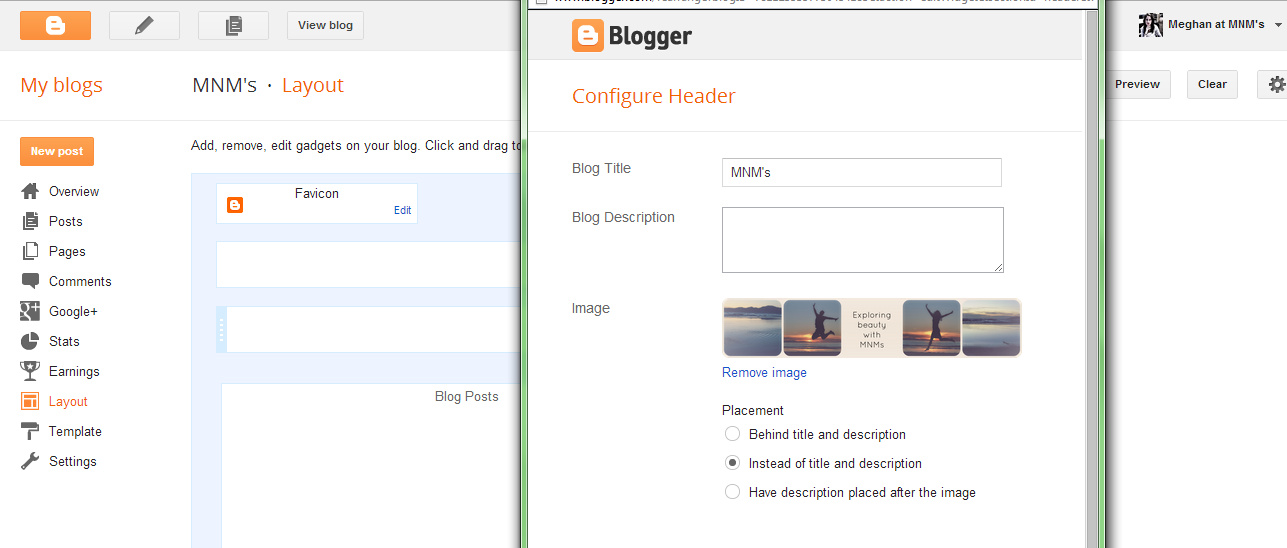
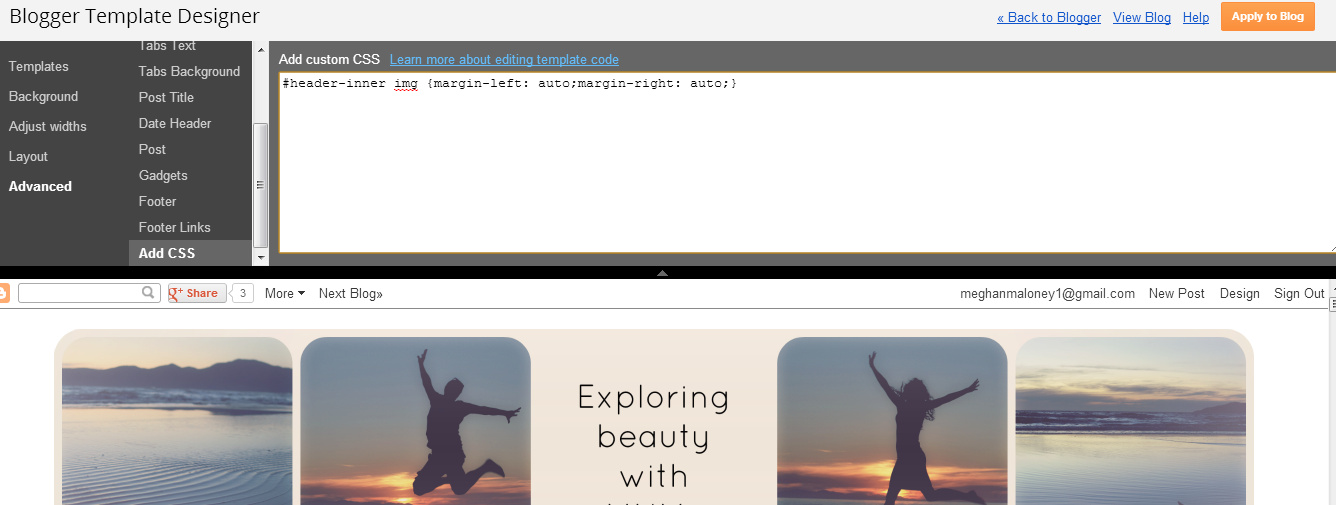
    We are all individuals! That is one of the beauties of the blogosphere, isn't it? One of the ways that you can personalize your blog design is to make your own one-of-a-kind design elements such as: a customized header, sidebar labels, buttons, and shareable widgets
  • Be organized and easy to navigate
    Above all, don't overcrowd your design! Keep it simple and easy to navigate!
    Try writing down all the elements you think you'll need on your blog and group them into categories. If it seems too confusing or overwhelming, trim your list down to the essentials. 

Designing a blog can be complicated but today we hope to outline some simple steps you can take to refining your blog design!

xo

2. Sidebar design elements

I think most blogs have a sidebar these days and most everyone is familiar with the concept of a sidebar. Still, I think it's important to layout the purpose of a sidebar and what an effective sidebar should do in order to design a sidebar that works best for you!

The purpose:

The main purpose of a sidebar is to make it quick and easy for visitors to navigate the different features on your blog without searching everywhere.

Additionally, an effective sidebar can give a new visitor a snapshot of what your blog is all about, what type of content they might find, and give them a better overall idea of the big picture of your blog.

What should a sidebar do?

-Highlight important information:

The sidebar provides opportunity to show readers something other than just the post they are reading. Many blogs use the sidebar to display the best or most popular posts or pages. Really, the sidebar should be used to highlight what ever is most important to your blog. If your most important content is your craft posts and recipes, than a simple listing of those categories can do the trick. If you’re selling a product, this is something that you’ll probably want to highlight on your sidebar. RSS subscriptions are a priority for most bloggers, so you’ll typically see links to RSS feeds at the top of sidebars.

-Give an overview:

As previously mentioned, the sidebar can quickly give new visitors an idea of what your blog is all about and what kind of content they can expect. A sidebar can be a great opportunity to explain your blog. This can be accomplished through an intro paragraph, but the sidebar also helps tell the story. Take a look at your sidebar, does it explain the story of your blog?

-Organize:

A sidebar can help display and highlight all your important information but it can also be a great way to organize your topics. Remember not to overload your sidebar as too many things in a sidebar is often confusing and distracting. Make a list of your MUST-HAVES and see if you can combine anything.

-Add to the attractiveness of the design:

Some sidebars (examples below) can go beyond just aiding in navigation but can really add to the overall visual appearance of the blog design. The sidebar shouldn’t be the main attraction and distract from the content, but it can be more than some simple text and links.

Tip: Organize categories by using clickable buttons and photos. Instead of simple text links, use social media icons that blend with your design.

taliachristine_sidebar
Source - Talia Christine (Yes, I'm shameless)

one_sheepish_girl
Source - One Sheepish Girl

mustard_envye_sidebar
Source - Envye Design Shop - Mustard Special

3. Clickable Images & Sidebar Buttons

A great way to add some a bit of flair and personality to your blog is to incorporate clickable images and sidebar buttons to your design. Making an image clickable can be easily achieved with a bit of basic coding.

Creating sidebar images:

There are loads of programs available to create simple sidebar buttons! I recommend either Picmonkey or Picasa to do the job. Both come with really great tools that make it easy to create dynamic images and both are FREE! You can use their library of fonts to create a simple button or use images you've taken and edited to create buttons.

Once you have your images ready you can begin coding them into your layout.

Step 1: Setting up the widget for your buttons.

To create the widget for your clickable buttons select Layout from the Blogger Dashboard then select Add a Gadget.

Step 2: Adding the image URL code

Select the HTML/Javascript option > Then add the following code to your widget and change the RED portion to your image URL:

<img src=”http://yourimage.jpg”>

Note: You can get the URL for your image easily after you have uploaded it somewhere. I usually use Flickr to upload my images but I'd also recommend Photobucket for hosting images. To get the image URL simply right-click the image and select "Copy Image URL". Alternatively, if you're using Flickr or Photobucket, there will be a share option which will automatically copy the image code to your clipboard. You can then paste the URL directly into widget.


Step 3: Linking the image as a clickable button

Highlight the code and select the link option in the widget. Type in the appropriate link URL (this is where you want the button to link to) and select 'OK' then save your widget.

sidebar_buttons3

Step 4:
That's it! Repeat for as many buttons as you would like!

Example
Button:


Code:
<a href="http://www.bloggersconnecting.com/"><img src="http://farm9.staticflickr.com/8531/8596959676_fc797b4286_o.jpg"></a>

4. Making Shareable Widgets

A shareable widget can be a great way to share your blog with others! Sometimes when you see a new blog that you really want to share you'll display their blog widget on your own blog. Providing others with a shareable widget (or badge) gives others the opportunity to do the same and thus expose your blog to potential new readers. Displaying your favorite blog buttons is a great way to build the blogging community!

Here is how you can make your own:


Step 1:  Setting up the code

Copy and Paste the following code into an HTML/JavaScript Gadget on your sidebar (or into the HTML portion of a Post, or Page).

<center>
<a href="YOUR BLOG URL" target="_blank"><img border="0" src="YOUR IMAGE URL" width="100%"/></a><br /><input value="&lt;a href=&quot;YOUR BLOG URL&quot; target=&quot;_blank&quot;&gt;&lt;img border=&quot;0&quot; src=&quot;YOUR IMAGE URL&quot; width=&quot;100%&quot; /&gt;&lt;/a&gt;" onclick="this.select()" type="text" />
</center>

Step 2: Getting your image URL

Upload your button image (I use both Flickr and Photobucket) and copy image URL.

TI_image_url


Step 3: Customizing the code to your blog

Paste your image URL into your HTML Gadget where I have indicated in red, and then paste your FULL website/blog URL also where indicated in blue. Save your work and enjoy your new shareable widget!

5. Photo Editing - Take a photo from good to great

There are a number of excellent free photo editing software packages available to use. If you prefer downloading a package to work with your photos offline then Picasa or Photoscape are both great options.

But one of the best free online tools is Picmonkey – which this tutorial will be using to illustrate some simple and effective photo edits.

First click on Edit a photo and select the photo you want to edit.


1. Crop
One quick way to focus attention on the right thing in your photo is by cropping out distractions. Let’s look at an example.

Download the image below for using as a test image for editing now by right clicking on the picture and saving to your computer or desktop.


In this example, if we crop out the column at the top right we can focus the attention more on the droplets of water falling on the boy’s tongue.


When you crop a photo, it’s always worth using the photographic rule of thirds where possible. You can see from the grid above that the boy’s tongue and the droplets have been deliberately placed at the intersection of one of the thirds. This immediately draws your attention to this part of the photo.


2. Exposure
Even if you have a great shot straight out of the camera, there are always small adjustments to make to a picture to make it really stand out.

Notice the difference once a few small tweaks of exposure have been applied. In Picmonkey you can use either the Auto Adjust button or use the individual sliders manually to see how an individual change affects the finished photo.


3. Filters and effects

This can give your photo a completely different feel – whether it is a vintage look, dreamy look or something completely unique that you are going for. Here is the same photo processed with 2 different effects.

Tranquil
This is an all-over effect which gives the photo a dusky, dreamy feel. Use the sliders to adjust the effect down. In this example I’ve chosen a 45% fade.


Sometimes if you are applying an effect, you’ll find the effect too strong on an area of the photo, especially if you have a person in the photo as the changes to their skin tone can be too harsh. That’s where the little paintbrush icon comes in. By using the circular brush you can click on the areas of the photo you want to keep as the original look without the filter. I’ve exaggerated the brush strokes here to show how you can paint back in the original colour:


Spotlight
This is a circular effect which allows you to better highlight different areas of your photo.


And the finished version:


Once you are happy with your edits, save the finished version to your computer.

6. Resizing photos for the web

It is important that when you save photos for use on the web that you re-size them smaller to maximise storage space online on your blog and to reduce the time it takes to upload your photo files. The maximum photo file size you should be aiming to put in a blog post is 500KB - 1MB.

In Picmonkey you can choose to resize your photo when you save it to your computer. You can also go into Picmonkey Settings and select which size file to work with.


If you have a blogger account you are allocated a certain amount of free storage space through Google. However, if you post a large number of photos over a period of time on your blog, you may find that you run out free storage space, even if you resize your photos to a smaller file size each time. If that happens, you can upgrade to paid storage, it only costs $5 USD per year for 20GB.

You can find out how much storage space you’re currently using by clicking on your blogger profile from inside your blog and choosing Account Settings.

7. Designing a header

There are many ways to create a blog header that draws the attention of your readers into your blog. One way is to use a combination of text and pictures to create a collage header.


For this example, use the Ducks in a Row option to make a 5 box collage.


Open up four photos that you would like to use and place one in each box.


By clicking on the Background (Palette icon), you can also change the background colour, make rounded corners and change the spacing of the collage.

At this point, save the Collage and then go back to the Picmonkey homepage, choose select Edit a Photo option and re-open this file as an image for editing.

Choose the Frames option and create rounded corners to match the rounded corners of the collage.


Click on the text option and write your blog tagline or blog name in the text box.


Add any filters you want to the photo. I used a combination of Tranquil, Dusky and Frost.


When you are happy with the finished result, you need to resize the photo and keep the original dimensions. Resize to either 1200 or 1024 in order to make the photo dimensions look right (i.e. wide but not too high) when they are uploaded onto the blog.

Save to your computer, and then open your blog and upload your new header through the Layout setting, choosing Instead of Title and Description option.


If you find your header is not centred on the page when you preview it, you can fix this as follows:

Click on Template > Customise > Advanced > Add CSS
Copy and paste the following code into the box and Save.

#header-inner img {margin-left: auto;margin-right: auto;}

8. Adjusting images to complement blog width

This tutorial is based around a Blogspot issue but the information is great for any situation that uses HTML to insert an image!

When inserting an image through Blogger it will often display the image as much smaller than the width of your blog EVEN if you have chosen the large option. If you're like me, you'll want the images to be as wide as possible to show off your images properly. This is easy to achieve with a little tinkering to the code.

Image added through Blogger:


Image after the code is edited:


Step 1: Adding your image

While editing your blog post enter into HTML mode. Select the "Insert Image" icon and upload your image files. For this tutorial I've selected an image of some bread that I baked and was feeling particularly proud of that day ;) As seen in the above example, the image appears quite small by default.

wider_images

Step 2: Editing the code

To widen the image we'll need to edit the code a bit. The image will then automatically fill the entire blog post area without extending past it. Woo hoo!

Okay. Deep breaths.

This is where we get all fancy and do some serious coding. But it's easy! It's all marked out for you. It boils down to this: Blogger squishes your image unnecessarily and adds lots of extra code that DOESN'T need to be there. We'll take out the superfluous code and add in the magic code that automatically makes your image as big as it can go without extending past the blog post area. Dreamy.

Here is the code for the image we've added to the post through Blogger:

<a href="https://blogger.googleusercontent.com/img/b/R29vZ2xl/AVvXsEgWx2mCSP65tOgjB5CRFR_iZnvmHln47F1Doq9qxcZOkPbTDgIrimtlIaQRsBMKCGj9Dnv34GvYpJxgMsJoC7JGq1zzX7Eyna8IQ1X4s8yZomsw83FONtJU_5xHi0VEZtrkAcPj7yanseo/s1600/bread.jpg" imageanchor="1"><img border="0" src="https://blogger.googleusercontent.com/img/b/R29vZ2xl/AVvXsEgWx2mCSP65tOgjB5CRFR_iZnvmHln47F1Doq9qxcZOkPbTDgIrimtlIaQRsBMKCGj9Dnv34GvYpJxgMsJoC7JGq1zzX7Eyna8IQ1X4s8yZomsw83FONtJU_5xHi0VEZtrkAcPj7yanseo/s320/bread.jpg" width="100%" /></a>

You DON'T NEED the parts I've marked out in red:
imageanchor="1"
border="0"

You DO NEED:
To change the img URL from /s320 to /s1600
Add: width="100%"

We are left with an image that is much larger and automatically fills the entire frame of your blog post area. BEAUTIFUL!

9. Wrap up: Thanks for Joining us!

We hope that having shown you a few simple ideas and examples you can see just how easy it is to create a blog that not only looks great but will draw your readers’ attention in and keep them coming back for more.

You may only ever want your blog to be read by your nearest and dearest, or you may have world blog domination in your sights, but either way, isn't it nice to know you can create a visually beautiful and functional space to lose yourself in happy creativity for hours on end?

We think so, and that’s why we were so committed to being a part of this workshop and bringing you these tips and tutorials today. We hope you can take away at least one new concept to try out on your own blogs and look forward to seeing the results as you put them into practice over the coming days and weeks.

We’ve also posted some good places to start with on the resources page, fonts, colour schemes, free photo editing software so do check these out in your own time. We will also post up any questions that we’ve worked through today in the Q&A section of the blog.

And if you find you need practical assistance when working through any of the tutorials, please send either of us an email on taliavanderwel@gmail.com or meghanmaloney1@gmail.com and we will be very happy to help.

All the best with your journey to a beautiful blog!

10. Q & A

Stay tuned for all the Q & A's from the workshop to be shared here! Alternatively, if you have any questions, feel free to comment below and we'll add them in :)

xo